 Goldfield, Arizona.
In 2014, my wife and I visited a recreated western town near Apache Junction, Arizona. Goldfield was an active mining town that lasted only until the gold mines played out. The post office only lasted five years. The town, however, lives on in the form of a tourist attraction. This year, we had the opportunity to visit there again, this time armed with a better lens and camera set to capture HDR (High Dynamic Range) photographs. Regular followers may recall that HDR is an image enhancement tool that takes advantage of multiple exposures to provide greater detail in the shadows and overbright areas. Oh, oh… looks like trouble is brewing on the streets of Goldfield. A couple of bounty hunters are looking for a gang of outlaws holed up here from a neighboring town. What’s up with all those people standing around? Don’t they know there could be gunplay?
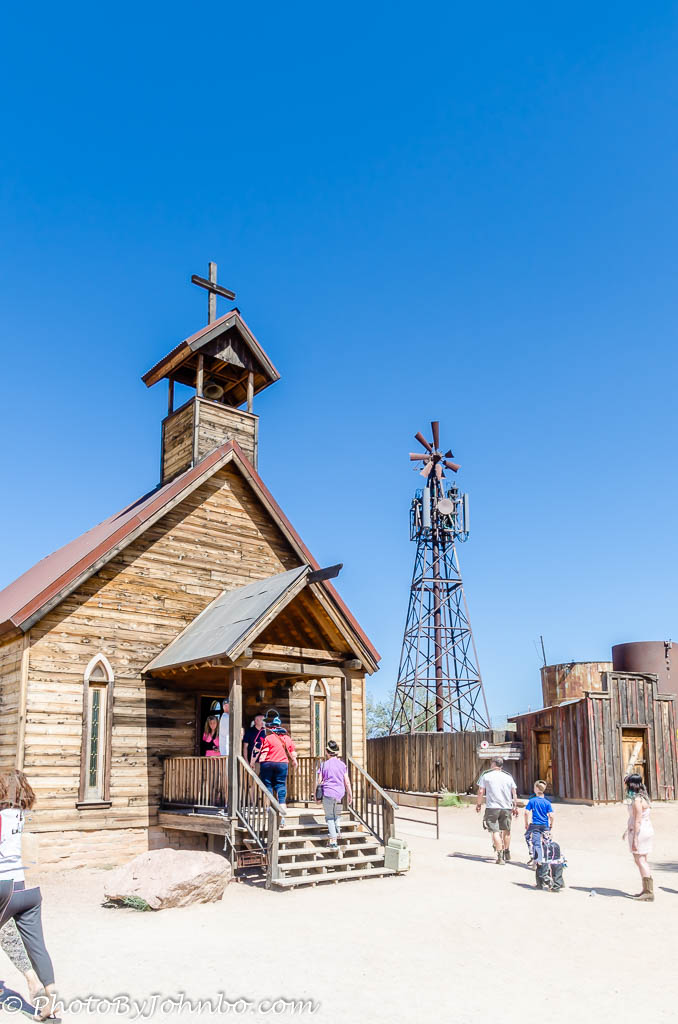
Back to my discussion of HDR. It is easy to “over-process” an HDR image, leaving the result grainy. Some prefer the artistic look of a highly processed HDR image. Me? Not so much. What I prefer about HDR is the technique’s ability to bring out detail in the shadows. In the image above, people standing in the shade of the chapel entry are properly exposed as well as the people standing in the bright sunlight. This trick is accomplished by setting the camera to capture three exposures, one each exposed for dark areas, light areas, and the correctly exposed image for the entire photograph. I included the above photograph because it also shows an unpleasant artifact of HDR processing. If there happens to be motion in the photographs, the three images may register that motion in different parts of the image. When that happens, further processing is needed. In the example above, note the person walking just out of the photo on the left. I used Lightroom to process the three images into HDR. As you can see, it had trouble processing the walker, creating a ghost-like multiple exposure. Lightroom has the ability to deghost, which I selected for processing, but as you can see by this image, it sometimes needs Photoshop, in this case to “fix” the walker, maybe to the point of removing her completely.
This image is the properly exposed image prior to HDR blending with the other two images. Note how dark it is under the church entryway. Compare that to the HDR image above to see the improvement. But enough about HDR. Back to Goldfield. A small chapel serves the spiritual needs of the community and is available for weddings and other appropriate ceremonies. The gallery of images below features a small selection of HDR captures processed in Lightroom. Click on an image to enlarge it and to scroll through the gallery. More images and a lot more detail about Goldfield can be found here.


I like both the pictures and your comments on HDR. I understand the concept, even the technique of HDR, but I’ve never actually tried it. Did you shoot one picture as metered by the camera and another one stop below and the third one stop above? And did you use a tripod? Thanks in advance for your answers.
I use the automatic bracketing function built into the Nikon D7000. I use a two-stop bracket, -2, 0, +2 stops for each exposure. I usually handhold the camera and set the shutter to fire three times with each shutter press. The Nikon has a user setting that I program for exposure, ISO, shutter speed, so I can quickly go between HDR and normal shooting modes.
I use Lightroom to merge the images, but I have friends who use freebie programs on their machines to merge the images.
Give them a try, they are fun to do. Thanks for stopping by and commenting.
Those HDR photos make for captivating colors! Well played. Looks like a fun stop.