Well, actually from Fargo, North Dakota, a view from a comet that is making the news. It won’t be in the news again for another 6500 years due to its very long elliptical orbit. By the time you read this, it may already be gone out of sight. I learned a lot about night photography when capturing the images here and I will share what I learned for the next time a celestial visitor comes within photographic range in our night skies.
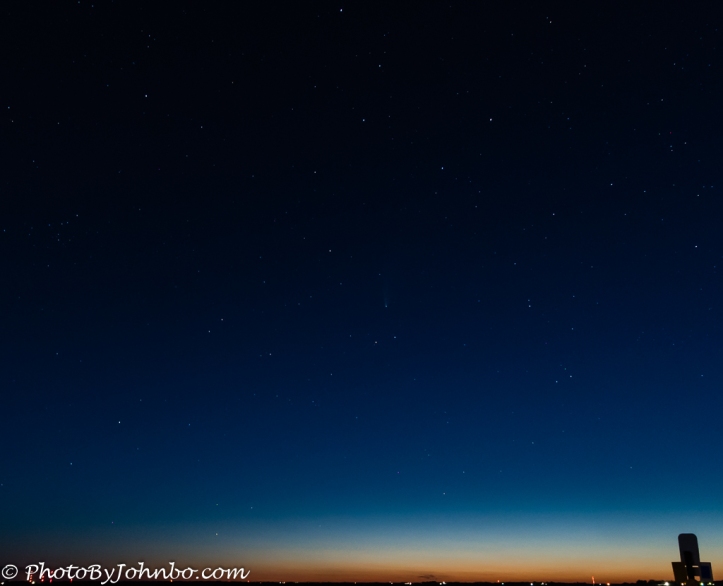
As of this writing, Neowise is appearing underneath the constellation Ursa Major (the Big Dipper). It’s low in the sky in the evenings, but as it moves away from us (closest point to Planet Earth was on July 22), it will appear higher in the sky. As the night goes on, the comet will appear to be moving downward as the earth’s rotation eventually blocks its view. In North Dakota, even though it’s present just after sunset, the twilight sky is too bright to bring it out, though it can be seen through binoculars or by long exposure photograph (if you know where to look.) By about 10:45 PM, it became visible to the naked eye, though just barely. For those who are totally uninterested in the mechanics of shooting the night sky, you may stop reading and scan down the page to the two “alternative reality” images I created using the sky replacement feature of Luminar 4.
Back to technique for those who are still reading, for this capture, I learned about the rule of 500 for shooting the night sky. Long exposures in manual mode are required to bring forth the star fields and especially the comet’s tail. The image above was shot at 10:45 PM on July 22. Camera settings were: lens at 26 mm, f/3.8; 13-second exposure; ISO-1250. Due to the earth’s rotation, long exposures will create star trails that take away the pinpoints of light. There are two ways to fix this issue.
Obviously, with exposures measured in minutes, the camera must be mounted on a tripod. Dedicated astrophotographers might use a star tracker that mounts on a tripod and as the camera exposes the image, the tracker rotates exactly opposite the earth’s rotation eliminating the trails. For those who seldom do night sky photography, the $200-400 investment for a tracker is better spent toward a lens upgrade. Instead, the rule of 500 becomes valuable. Based upon a full-frame equivalent lens, the longest shutter speed you can use is equal to 500 divided by the focal length of the lens. In this case, the lens was set to 26 mm, but since my camera is not a full-frame, I need to multiply the 26 by 1.5 to allow for the crop-factor of my Nikon D-500. That means the effective focal length is 39 mm. Using the rule, 500 divided by 39 is 12.8205. I set the exposure to 13 seconds, slightly longer than the rule, but close enough that the stars look like pinpoints rather than trails.
Another rule that might be helpful is the 600 Rule. It states that 600 divided by the focal length of the lens should equal your maximum exposure time. The application of this rule in my case works out to 15.38 seconds. Given this rule, my exposure setting of 13 seconds was well within the tolerance needed to eliminate star trails. For more detailed information and a handy chart to use if you have a crop-sensor camera, look here for a reference article that also describes when to use the 500 or 600 rule.
 The image above shows a wider view of the night sky. I realize it’s especially hard to see the stars on a screen with a white background. If your browser allows it, you can click on the image to make it larger. I have also posted these two images in full resolution to my Flickr page here. Click that link to see the images on a black background. In this image, it’s especially hard to see the comet. At the top center you might recognize the “bowl” of the Big Dipper, and below that, almost dead center, two brighter stars. The comet is above them. The Flickr page allows you to zoom into the photo for a better view if you are so inclined. Exposure details are lens set to 16 mm at f/8, 20 sec; ISO-2000. You can do the math to see if the exposure meets the rules of 500 and 600 (don’t forget that for 16 mm on a crop-sensor Nikon camera you need to use 24 mm in your exposure calculation.)
Pressing the shutter with your finger to start the exposure can create another problem. That pressure can induce the slightest camera movement detracting from the sharpness of those star pinpoints. To eliminate that effect, simply set the self-timer on your camera. When you press the shutter, the timer will count down and any camera movement caused by the shutter press will be totally dissipated by the time the exposure begins.
If you have an “old-fashioned” single-lens-reflex (SLR) camera like I do, there is one more potential for camera movement that must be accounted for. That’s the camera shake created by the mirror in the viewfinder “snapping” out of the way to expose the sensor. With my Nikon D-500, that problem is solved by using “live mode” which puts the mirror out of the way and transfers the view finding function to the display screen at the back of the camera.
The last item before the exposure is to focus manually. You can use auto-focus to focus on a bright star or on distant earthbound lights. Then immediately switch to manual focus and use a piece of tape to keep the focus ring from being inadvertently moved. It’s finally time to press the shutter. I tried various ISO speeds knowing that there will be more noise in the images with the higher ISO settings.
 One last thing to do with the comet images brought me to Luminar 4’s sky replacement feature. Just for fun, I couldn’t help but convert the sunset image captured at Mazatlan, Mexico to imagine what it might have looked like on the evening of July 22, 2020. I darkened the exposure of the original image to make it appear to be a much later twilight than it was when captured a few years ago. Replacing the sky with the comet image and tweaking the advanced sky replacement tools gave me an “alternative reality” image.
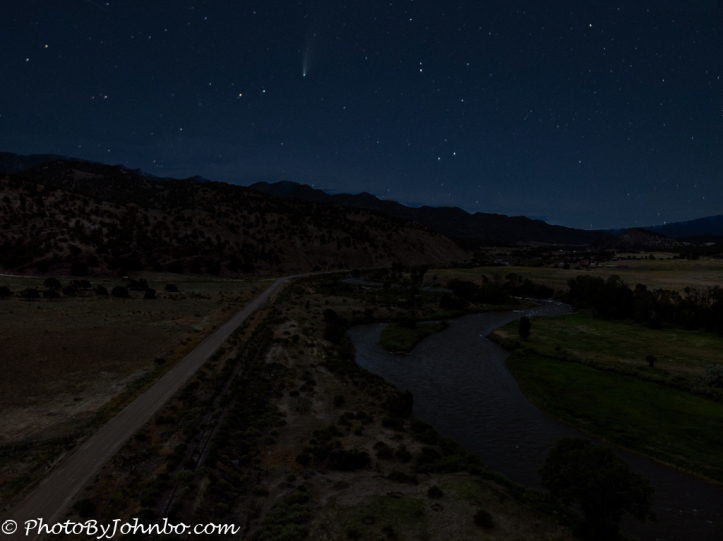
 One more image captured near the town of Howard, Colorado, is a capture from my drone on a very cloudy day. Again, darkening the exposure and using Luminar 4’s sky replacement brought an image of Neowise over the Rocky Mountains. These images are just for fun. Though the ocean image was captured with the comet in a relatively correct compass direction, that’s not at all the case with the Colorado image. But, who cares? It’s all in fun.
John

Nicely captured.
Thanks!
Awesome photos, sir! Can I show some of these in my blog?
Absolutely! Thanks.
Thank you, JS.
Great photos, what talent with these photos. ITried to get a glimpse of the comet on the east coast, just too much light to see it in the sky.
Thanks. I had lots of expert help. I see in the next few days, a meteor shower is going to be promising.