I am writing this as my wife and I self-isolate in our winter place. A couple more weeks and we will venture back to our home in Fargo. With less travel on my schedule, last month I shared some of my work flow using Luminar 4. This week, we take a peek at the Creative section. As with my earlier post, this is not a full review, I am just sharing some of the tools that I use. I don’t find myself using anywhere close to the full capacity of the program, preferring instead to keep my images all with a similar “look and feel.” This month, I get a little more creative for those times when I want to do something “special.”
The opening image features a shipwreck sitting in the lagoon on the atoll in the central Pacific Ocean known as Fanning Island. This image is a far cry from the original shown below.
The original image suffers from an overcast sky. I captured it from the cruise ship tender as it took us to the island. Shortly after I took the photo, a rain squall went through and the rest of the day went from cloudy to mostly sunny. I needed to do something with the sky to make it more photogenic. A few years ago, I loaded the image into Photoshop Elements and painstakingly masked a new sky around the ship’s superstructure.  That sky replacement is shown above. The blue sky and clouds makes it look a lot better, and I considered it done. Then along came Luminar 4 and it’s sky replacement feature. The program even comes with a collection of skies to use, although in an effort to keep the images all my own, I am gathering my own collection of sky images as the opportunity arises. The opening photo features one of the sky images in Luminar’s collection so this version of my “altered reality” is not all my own. Nonetheless, it’s a much better image than even my own attempt at sky replacement.
OK, now it’s time to comment that many photographers think it is somehow sacrilegious to modify an image for a better sky. We are supposed to wait around for that perfect time when the clouds and sun present themselves in a perfect storm for the image. Well, life for the amateur photographer simply doesn’t work that way. The entire premise of the Creative tools in Luminar can be summed up as “altering reality.” It truly embodies Ansel Adams’ quote, “You don’t take a photograph, you make it.”
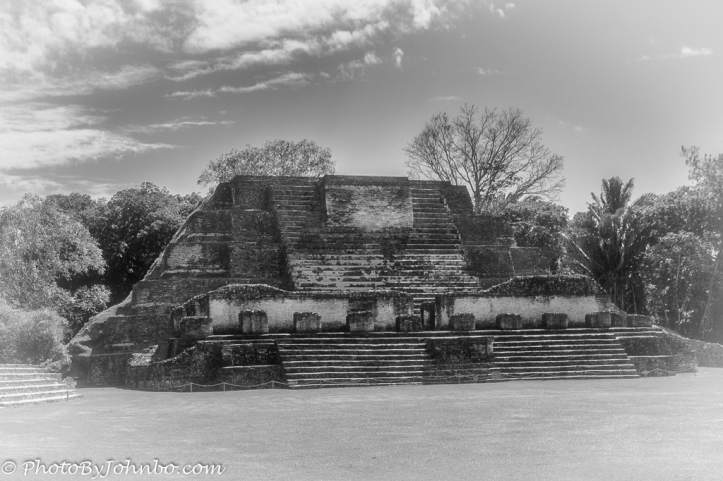
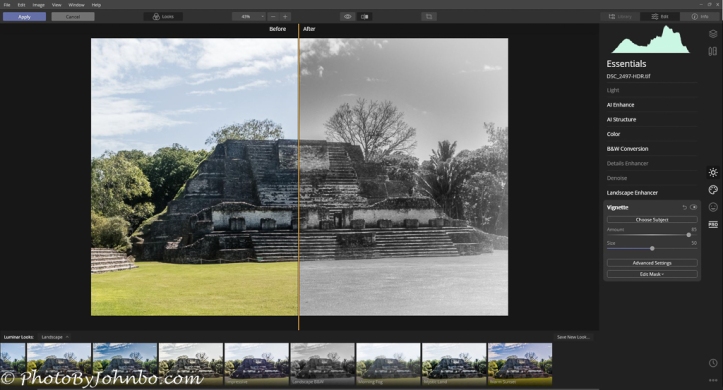
 As I noted last time, Luminar includes “Looks”, their term for presets that can give you a head start at pre-editing the photograph. I seldom use looks in my work, preferring to go through my specific collection of tweaks manually, one control at a time. For the purpose of this article, though, I decided to do a black and white conversion. The Temple of the Masonry Altars is found at the Mayan Ruins of Altun Ha in Belize. Though I prefer the tools for black-and-white conversion in DxO’s, (formerly NIK), Silver Efex Pro 2, for this post, I chose to use the Landscape B&W Look and then played with some of the other creative tools to produce the final image above.
 When you have Looks visible, they show up at the bottom of the screen. The program comes with a wide variety of Looks for various photographic genre. You can also create your own style format and save it as a Look to use as you wish. I could do that with my own edits, but find I enjoy the action of tweaking each item in a specific order. Does that make me OCD? Could be.
Finally, you can have a little fun with sky replacement. Once you learn how to use the tool, you can create other versions of altered reality. I submit for your approval (or not), a gallery of images from this post. Included in there are some “just for fun” altered reality images.
John Steiner


Greetings, John. The program Luminar 4 is also one of my newer photo tools. Have used it quite a few times. I like it using the Sky replacement feature. I also like many of the other useful editing tools. Enjoy it, like I do.
I really like it.
I haven’t tried the Luminar yet. I really like your sky replacement!
The tool isn’t completely idiot-proof, especially if there are waters or other reflective items that continue to reflect the original sky. Another thing that one must be careful of is the direction of the sun. When shadows fall to the right, and the brightest part of the sky is on the right, it’s an immediate give-away.
In all, it’s a great tool to be used sparingly, but with great success for certain images.
Stay tuned for my take on portraiture. I don’t do portraits, but with all the advanced tools in Luminar 4, I may just start.
Thank you, John for sharing your experience. Looking forward to your portrait series.