
This week, Bren of Brashley Photography guest hosts the Lens-Artists challenge. She writes, “For this weeks’ challenge, show us how you soften your images. You don’t have to stick to flowers, landscapes and architecture are also ideal subjects. By lowering the clarity and creating softness in those areas frames the subject in an image, be it a tree, path, bridge, even a door or house or just a dreamy looking image.” You can read her entire challenge post here.
I’ve been following Bren’s responses to photo challenges and have always been impressed with her photography. I was happy to learn Bren would be guest hosting a challenge. In the text of her challenge, she provides some instruction on her techniques for image softening to give the viewer an impression of a dreamy scene.
I have on many occasions applied negative clarity or soft focus filters to some parts of an image but have never tried to soften an entire image. For example, I usually add structure to bring out the details in landscapes, but by masking the skies separately, I often apply negative structure or negative clarity to the skies to make cloud formations take on a more whispy and dreamy appearance.
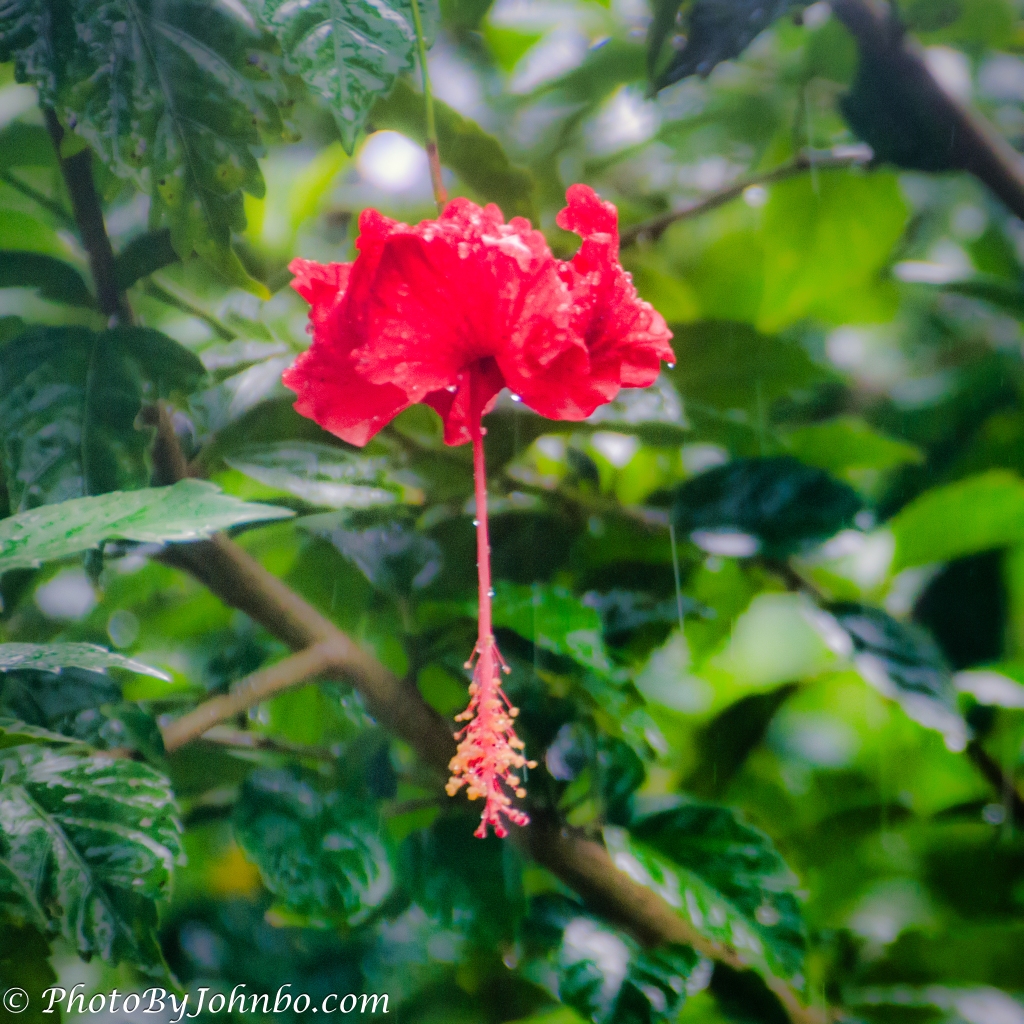
This challenge required me to create softer versions of some of my favorite photos. On a rainy day in Hawaii, I found a beautiful red flower soaking in the raindrops. The skies were dark and I used a slow shutter speed. That created a cool effect in that the raindrops became streaks. To soften the image, I used Adobe Lightroom and masked the flower. With the flower, I removed a bit of clarity. Then I inverted the mask and moved the clarity slider almost all the way to the negative stop providing a completely out-of-focus background.

This waterfall in Glacier National Park required just a touch of negative clarity in Lightroom. As is my norm, I’d bumped up the structure in my original image. I used a slow shutter speed to blur the water in the falls, so all I had to do with the original was simply not touch the structure, and back down the clarity.
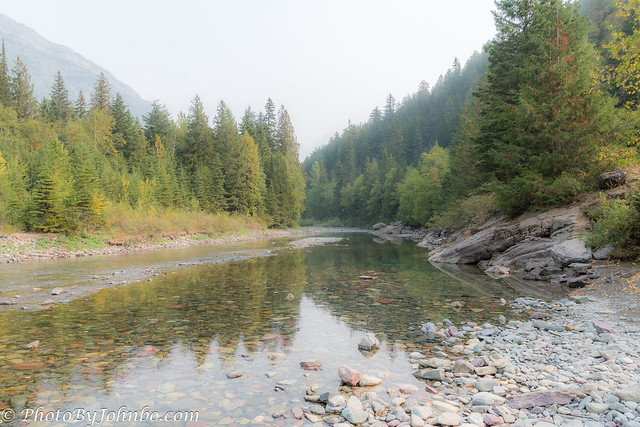
In a similar manner to the waterfall image, I added just a bit of negative clarity to this image, but I also masked the sky to make a tweak or two to emphasize the fog’s complete lack of structure.

One last landscape shot from Glacier National Park on that foggy morning provided my last image in landscapes. The background in this image was really lost in the fog, so I wanted at least some detail on the opposite shore. Using Luminar Neo’s masking, I used the Enhance Tool to bring out details in the background. Then I used Luminar’s Mystical Tool to remove some of the clarity that the Enhance Tool added to the foreground.
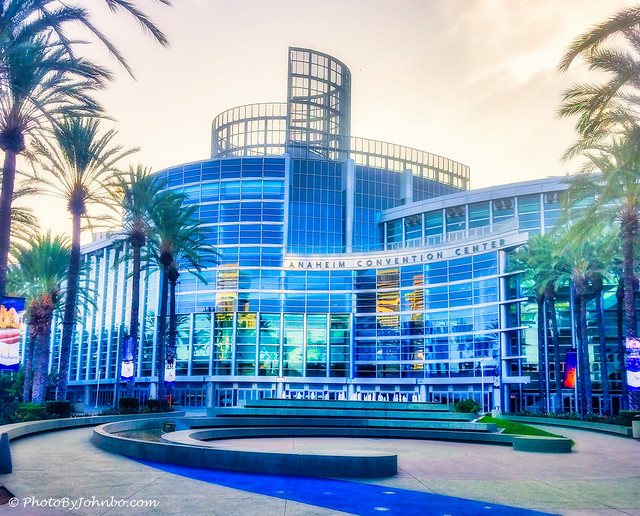
This beautiful building was featured in a post from 2018 about the nearby Disneyland’s free shopping mall area. Luminar Neo’s Mystical tool added a dreamy effect to this image.
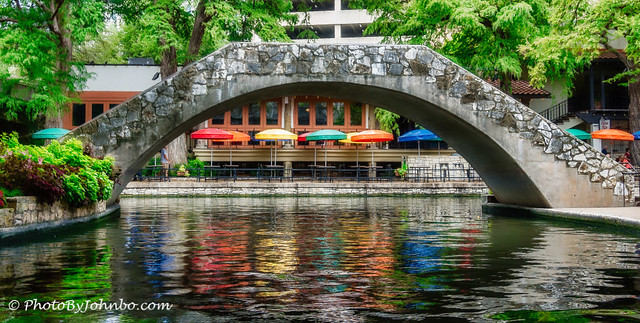
My last two images are from a Riverwalk cruise boat in San Antonio, Texas. Both of these images were processed to be more dreamy for a previous challenge on another topic altogether. The view of the umbrellas through the bridge arch features Casa Rio. Opened in 1946, the restaurant is the oldest continuously operating restaurant on the Riverwalk. This image was processed in Lightroom and a filter was applied in Photoshop.
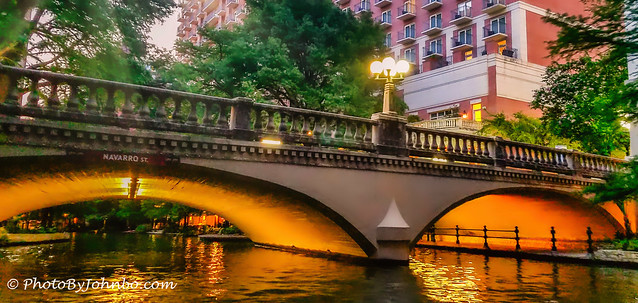
It wasn’t quite sunset as our cruise boat approached the Navarro Street Bridge, but it was dark enough that the bridge’s lights were on. The photo gives away its true time of day through the bright sky behind the trees. Still, I thought this image might be more dreamy by making it appear to be a blue-hour image. I lowered the exposure of the entire image, then I put a radial filter around the lights on the bridge deck. I increased exposure in that circular area to mimic the street lights illuminating the nearby trees. Finally, I added just a touch of negative clarity to enhance that dreamy effect.
Thanks to Bren, I’ve been given another look at how I process my own photos, and I am now more likely to use less clarity or add a bit of “Mystical” to my images when it’s appropriate. To view all of these images in 2K HD, visit my Flickr album here.
Next week, Ann-Christine hosts the challenge. Consider this an invitation to join in the fun each week and submit your own challenge responses. If you aren’t sure how to begin, you can find all you need to get started here.
John Steiner

Kayaking is my favourite John 🙂
Thanks, Brian! Fun challenge for me in doing the opposite of what I usually do. 🙂
As I was reading your post, I was loving the softness of the foggy photos and thinking this is just perfect. Then, I got to the very vibrant Anaheim and that was awesome. What a great shot for this challenge, John. Hibiscus are always hard for me to photograph but you’ve done really well 😀
Thanks, Sofia… and you’ve unwittingly reminded me of the name of that red flower that I couldn’t think of when I originally wrote the post. >grin<
🙂
I really enjoyed reading your detailed descriptions of your processes – you’ve got me thinking about techniques I could try!
Thanks, Sarah. I guess I watch too many YouTube videos on photo processing where some photographers go into great detail on how they process a specific image. >grin<
Thank you for joining…beautiful shots. The waterfall and the bridge photos are my favourites. With the bridge, I love how you’ve drawn me to under the bridge to the seating area. And the other bridge is just pure magic xx
Thanks, Bren. Your challenge has shown me that sometimes I need to think about less clarity rather than more. 🙂
“Mystical” is a great choice of words John. I loved that you went back and recreated some of your previous images. The waterfalls is terrific and I loved the light under the bridge.
Thanks, Tina. I can’t take credit for the term ‘Mystical’ as that is the actual control name Luminar uses. It appears to be a slightly stronger version of clarity.
Love the water fall especially
Perfect pictures for today! Thank you John.
Thanks, Eithnea!
I’m finding it interesting to see how everyone does their “soft” photos. You have some lovely ones.
Thanks, Janet!
Love the Hawaii’s click and
Kayaking in the mist click.
Dreamy indeed!
Thanks, Philo!
Thank you for sharing your post processing tricks, John.It’s amazing how the littlest tweets have such impact. The kayak photo defines tranquility . And the colored lights under the river walk in Austin is spectacular. Loved your selections this week. .
Thanks, Donna. I guess that’s the former teacher showing up in my work. >grin<
I’m glad for it!
The last two are really wonderful, John 🙂
Thank you, Hammad!
Loved your post with explanations on the technique used – and it all turned out great! Loved especially the waterfall and the first bridge.
Thanks, A-C!
I think that you followed the challenge differently than I did. Guess I didn’t read it carefully. I like the Disneyland shopping mall, and the kayaking in the mist.
I don’t know that I have a monopoly on how these challenges are supposed to work. >grin< it is certainly possible that I misinterpreted many a challenge over the years. All in all, it is about sharing our love for photography!
[…] Lens-Artists Photography Challenge #237 – Bringing softness […]