
Fargo, North Dakota.
Note: I am adding this pre-script to let you know that this week Skylum released the full release version of Luminar Neo (version 1.1.0). They have added a portrait background removal tool and made some other improvements. One item to note is that I mention in the article the need to have a gray background image if you want to put anything behind the subject layer. That’s no longer necessary as any layer can now be moved ahead or behind any other layer. Now, on to my digression…
I’ve been spending a lot of time on YouTube learning tips and tricks for Luminar Neo, Lightroom, and Photoshop lately. In the process, I happened across a photographer with tons of talent in creative image compositing. By way of definition, Compositing is the process through which two or more images combine to make the appearance of a single picture. The composite process can be done on-set and in-camera or during Post-Production.
After watching Gary McIntyre’s video, “Luminar Neo: Creating New Worlds”, I could see that like all professionals, he made it look easy. Well, it’s not as easy as it looks, but in the process, I learned a ton about Neo’s layers function, available in the most recent releases. I used v. 1.0.7 for my experiments.
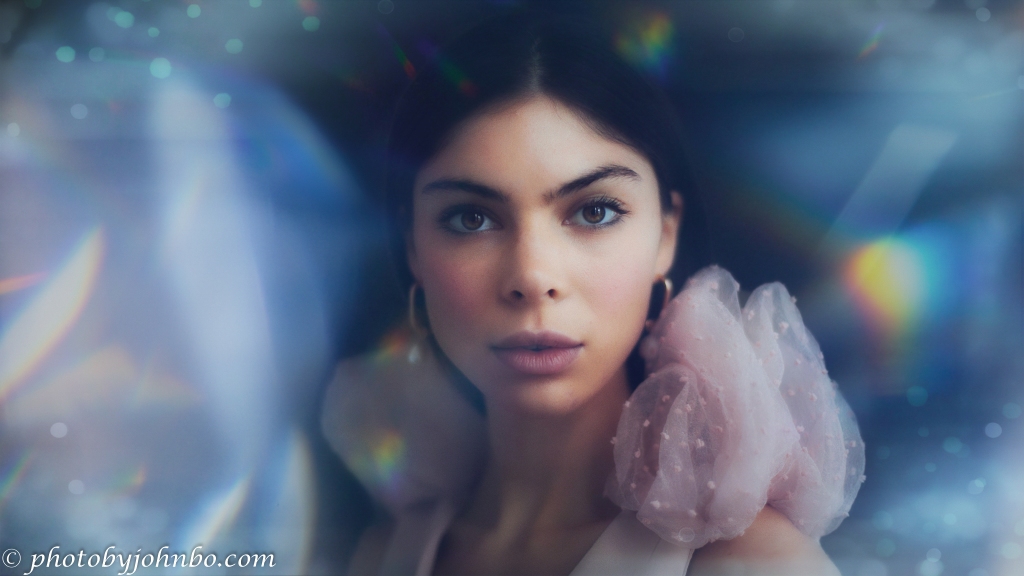
The opening photo is the result of my first attempt at creating a composite image. I was smart enough not to try to do something as complex as Mr. McIntyre’s creation. I still have a lot to learn, especially when and how to use the various blend modes in overlaying an image to the base photo.
For my first experiment, I chose one of the sample images provided in Luminar Neo. One of the things I learned early on is that you cannot put anything behind the base image. In one of Gary’s videos, he noted that to allow overlays to be behind the subject, create a base layer of solid gray. Once that’s down, the subject can be on one of the layers and others can be stacked in front or behind as necessary.

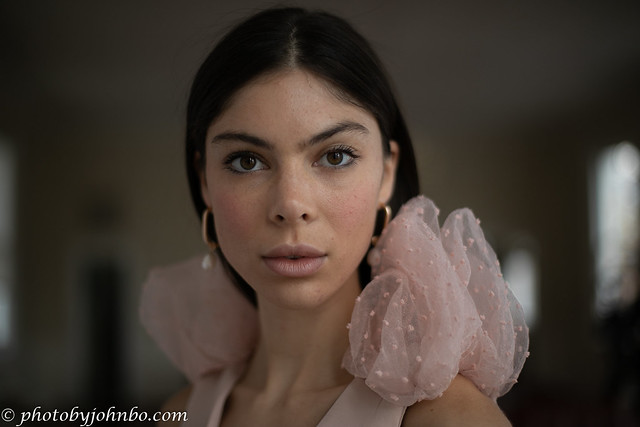
After adding the lady’s image above the gray screen, I used the portrait tools to touch up the portrait, used the Mystical tool in the Creative edits section to soften the image, and then I started experimenting with background and foreground layers adding bokeh and light leak layers from the kit that is included in Neo. I thought I was done, then I tried one of the flares and started experimenting with presets. Those last two steps provided some extra “pop” in the final image at the top of this post.

I have very few images to choose from, and nothing really unique in my archives, so I took some advice from Gary McIntyre’s video to use one of his links provided for a royalty-free selection of characters. The lady in the red dress is from a site that provides characters and backgrounds for graphic artists. They have a bundle sampler of 100 characters that can be used personally for training and for limited publication. There is no charge for the bundle other than to provide your name and email address. The site is https://neo-stock.com and I found the information about their free character files here. Except for the lady in the opening image, all characters in these images came from the stock sampler provided through the PhotoManipulation site. With the download, a limited use license is provided that more than meets the criteria for my use in this blog post.
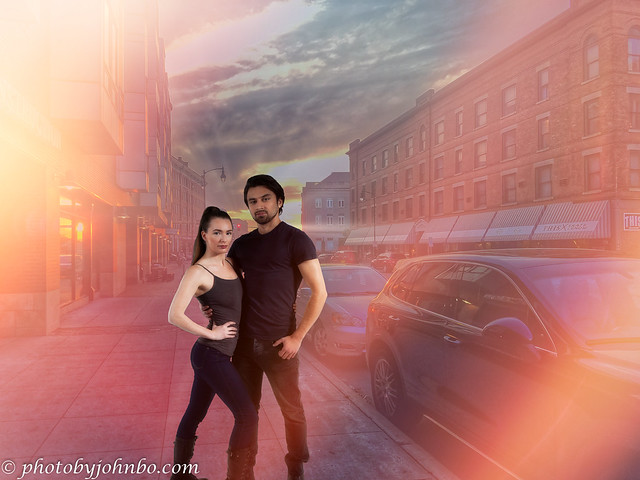
I used a street scene I captured in Fargo for my first background. Frankly, I wasn’t impressed with my final result, but as they say, “You have to crawl before you walk.” I did get some practice in integrating the background, and no gray backdrop is needed as nothing will go behind the scenery layer.

I felt a little better with my second image, an archer that “popped up”, her weapon drawn near one of the waterfalls on the Columbia River I photographed a couple of years ago.

My final share for you is a world I created using one of the Luminar Neo skies as a background. Over that sky, I put two layers, both images of the Native American ruins at Casa Grande, Arizona. Luminar’s masking function does a great job of eliminating parts of the image you don’t want to appear in your composite. Eliminating the skies in the two images was easy with Mask AI. I exported the final background image prior to color matching to show you how I put the two images together before adding the character.

With the two layers in place, I adjusted the color of the wall on the right to more closely match the color of the ruins in the background, then I got the bright idea to include an image of a blood moon in the sky. I also used the erase function on the layer with the ruins to remove the sign that describes the ruins to visitors.
I added a light leak layer, the character, and a couple of special effects behind her. Neo’s Mask AI found the human in the image and I was easily able to remove the background from her image. I gave the layer she’s on some Orton Effect but masked her face to keep it sharp.
I’m not sure that I’m going to do more of these, but it was a nice two-day exercise in something different that I’ve never tried before. I enjoyed watching more of Gary McIntyre’s videos. He’s truly a master at his craft. Earlier videos in his library feature composites created with Photoshop. After watching a couple of those, I could see Photoshop is a much more versatile tool in this application, but it also appears to require a lot more expertise than I have.
I have placed all of these files on my Flickr site for you to pixel peep in 2K HD, and if you want to try your own composite, I’ve also included a gray background that you can download and use. My Flickr Composites album is here.
John Steiner

That’s very interesting, John. Thanks for sharing all this information. I love playing around with LR and PS creating something new. I’m not familiar with Luminar Neo, only have Luminar 4 and use it mostly for portraits.
Neo has some pretty cool tools for tweaking portraits. That’s not an area I focus on, so I don’t often get to use the tools. I do like the automatic bokeh tool in Neo since I don’t have a lens that opens beyond about f/4 or so.
Any one of these would make a very interesting book cover. Generally, I am not a fan of composite photography but I can see how they serve a purpose, especially in advertising. Looks like you had fun creating these.
It was a fun project that taught me a lot about how Luminar’s layers worked, and that was my goal. I, too, am not a big fan of compositing, but it was truly an interesting exercise.
Thanks for stopping by and commenting!
Always my pleasure.
Very interesting to read of your experiments with Neo. I’m still really not exploring it properly but one day when I have some spare time I must investigate the layers functions 🙂
Had I not run across that video on YouTube, I’d probably not have given layers a thought. Earlier versions of Neo had a much less capable layering function. This version is much more versatile.
I’ll have a proper look some time!
John, I admire your quest for creativity in photography. I’ve looked into layers in Photoshop and that’s about as far as I got. Just looking! You’re spurring me on, which could be good or frustrating!
Give Neo a try for layers. Just watching some videos in using Photoshop had me admiring the work of these talented compositors. Neo seems much simpler, but then, I have a lot more experience using it than Photoshop.
I tried Luminar, but it kept wanting me to buy when I already had a license. Their customer service was not that helpful so I stopped using the program. I thought the program was great, but lacked tech support.
Understandable. I must say that they were prompt in dealing with the issues I’ve had over the years… but I’ve not had many problems either.
Stunning edits… You’ve got me inspired
Thanks. It was a fun experiment.
Very cool!! I’ve not heard of Neo. I may need to check it out !!
Give it a try. You can download it and use with a trial period before you commit to buy. I’ve been a fan of Luminar since I purchased Luminar 2018. Neo was just released earlier this year.
Thanks, John. I want to tackle those tricky layers so I can make art from my art. I’m struggling to find time but you’ve inspired me not to give up on my plans. I think you have done a terrific job here.
I’d love to see what you create!
Thank you for your in detail explanation.
A worthy try.
Thanks. Now that Luminar is at version 1.1, I might experiment some more. We’ll see. 🙂
Let us also know how your experiments going on with 1.1
Are the updates free?
How long they provide free updates?
Topaz software provides one year updates free for the purchaser.
I don’t know their schedule for free updates, but it seems a year or two for previous versions of Luminar.
Neo is a bit of a special case right now as it was released with version 1.0 in a status I would call not yet finished. Their several updates to 1.1.0 have all been free, but they should be as it is now finally in the feature set that was advertised during the pre-order process.
Thank you John for the information.
I hope things will settle as they evolve.