
Lately, I’ve been spending a lot of time studying photography and photographic techniques via YouTube videos. This post is another attempt to re-process images in a style I learned about from a video.
Hayley features videos about creative photography via YouTube. I happened across the video here that demonstrates a technique for processing animal portraits using creative photo editing to remove distractions using Photoshop. Her methods are easy to follow and create an exciting and different look to a photo that especially is useful when capturing animal portraits at a zoo.
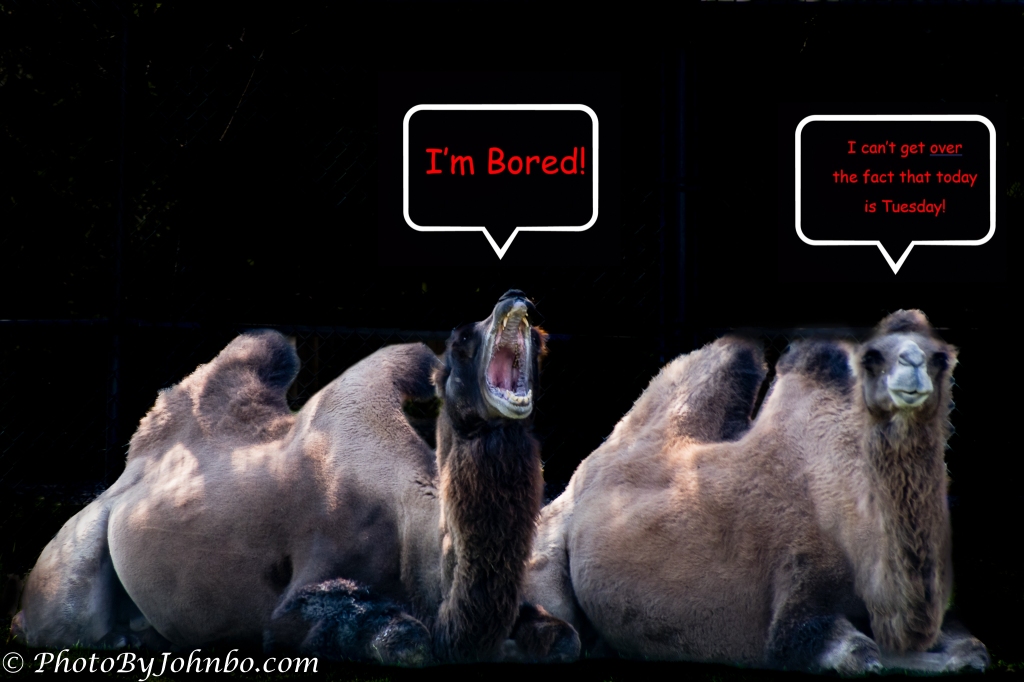
My first example went even a bit further in that I added cartoon bubbles to put some thoughts in the camel’s heads (of course imagined by me.) Not having the tools to create my own cartoon bubbles, I found some royalty-free clipart to use. Credit to the supplier of the clipart is requested and gladly provided: http://www.freepik.com/

While walking through the Red River Zoo in Fargo one afternoon, I noticed two camels at some distance from where we were walking. I was quite far from the Bactrian Camels but the 300 mm zoom lens brought them up close. I happened to catch one of them in mid-yawn, in a moment of boredom, or maybe he was proud of his two upper incisors and was just showing them to me. It would hurt to be bitten by a camel.
As you can see by comparing the two images, the technique simply removes the background by selective exposure reduction, cloning, and erasures of background distractions. Though Hayley uses Photoshop in the tutorial, I am more comfortable using Luminar Neo and I felt I could create the same effect using Neo’s masking features.

In Costa Rica, we visited a wildlife sanctuary where animals that were injured in the wild or otherwise couldn’t survive on their own are housed. I could barely see the leopard hiding behind a log in the back of his enclosure. I waited for some time for him to move, but our group was moving on. I captured the image but was never really satisfied with it. Hayley’s technique rescued this image for me and it’s another example of why I have two hard drives filled with my rejected photos.
Using a linear mask, I darkened the log in the foreground. Then I used a radial mask to raise the exposure on the leopard’s face. His eyes were still in the shadows, so two small radial masks were applied to the eyes to raise the exposure and brighten them. Using the brush tool, I manually masked the background and lowered the background exposure. I decided to leave the background partially visible as it looked natural in the final image.

Probably my favorite image in this series is this scarlet macaw housed at the sanctuary. These beautiful and colorful birds are found in rainforests in Central and South America. The typical scarlet macaw is large, about 32 inches (81 cm) in length, and has a 3-foot (1 m) wingspan. The typical weight is 2.2 pounds (1 kg).
I started by using a radial mask to cover the head and upper body of the bird. I added the mask to provide a gradual exposure transition to draw the viewer’s eyes to the head of the macaw. The radial mask in Neo is always a circle by default, but I morphed it into a long, narrow oval and tilted it to an angle in line with the subject. This allowed a nice fade toward the tail feathers.
For this image, I decided to include the branch as part of the subject. As the underside of the branch was already shadowed, I only needed to include the bottom edge of the branch in darkening the background. I used a brush mask to highlight the branch and raise the exposure to ensure its prominence in the foreground.
Darkening the background was accomplished with a simple exposure reduction. Some bright spots in the background were easily eliminated with the application of the erase tool.
One tip for helping to eliminate any halos or minor errors in manually masking around the subject is to close the Develop module after darkening the background. Then reopen the Develop module, choose the brush mask, and set the softness and strength sliders both to 50 percent. Carefully outline the edge of the subject with the brush. That technique will cover any gaps where the background mask didn’t quite match the edges of the subject and the lowered softness and strength will make a nice transition between exposure levels.

This Red Panda looks cute and cuddly, and I bet someone could make a fortune selling stuffed red pandas at a store like Build-a-Bear. Make no mistake though, check out the claws on the feet. You don’t want to tangle with those, and I understand this animal has a temper. About the size of a domestic cat, they are excellent climbers and can even hang upside down from branches. Red pandas are also good swimmers, as well. Like their larger namesake, the red panda eats bamboo.
I would have liked to capture the panda at eye level, but the enclosure was sunken below the pedestrian viewing area. I could only get this overhead view. I used a radial mask to focus on the panda’s upper body and then used the brush mask to darken the background while leaving the log and rock normally exposed. The bright sunny day turned into a bright moonlit night.

The Canada Goose is easily identifiable by the white “chin strap” under the head. The black neck abruptly connects to a brown and white body. These are the geese that fly in those familiar “V” formations where one leg of the “V” is longer than the other. I’m told that the reason for one leg being longer than the other is that there are more geese in that line. (Sorry, not sorry for repeating the old joke.)
There was a chain-link fence behind this Canada Goose that presented a problem with alternating bright and dark diamonds that were unmistakable. This was the first image I converted and I used Photoshop to highlight the subject. It did a nice job and I was able to easily make the conversion with the exception of the highlights in the fence. I couldn’t get Photoshop to do what I wanted it to do. I exported what I’d finished back into Lightroom and then ported it to Neo where I used the erase tool to quickly and cleanly remove the highlights from the background. When the image was finished I noticed for the first time that I could see my reflection in his eye.

There are prairie dog towns all over the great plains in the United States and Canada. A prairie dog community consists of many family groups called coteries. Each coterie consists typically of one or two males and several females and their pups. The prairie dog is a cousin of the ground squirrel.
This conversion was probably the easiest in Luminar Neo. I used the brush mask to darken the background, then I darkened the entire image to take away the brightest highlights on the subject. I decreased the strength and softness of the brush tool to go around the edges of the subject, but for some reason, I had some masking issues with the area just below his front paw. I worked with it for some time undoing and redoing the mask and was never quite satisfied with it. I finally called it “good enough.”
If you like the final look of this style of animal portrait, give the technique a try. It’s an easy way to hide the fact that an animal was photographed in a zoo or other unnatural habitat. I’m interested in your comments. Please let me know what you think of the results and whether or not it’s something you might experiment with. You can view all of the images in 2K HD via my Flickr site here.
John Steiner

Fantastic photos! The editing really helps them stand out more!
Thanks! I am going to remember the technique for future trips to wildlife areas.
Thank you for the great explanation! I really enjoyed it. I just wish I had access to Photoshop to try out some of the techniques you shared.
Understood!
These are wonderful John 🙂
You have a great deal of technical talent and patience John! Wonderful stuff.
Thanks, Anne! My wife would say that I have too much time on my hands. >grin<
😊
This is really interesting John and I’ll certainly bear some of the suggestions in mind when editing similar shots in the future. I like best the ones where you’ve left a hint of the background, as with the leopard, but my favourite is the red panda!
I found this exercise to be a fun diversion while helping me learn more about the tools I use.
Thanks, Sarah!
Lots of beautiful photos, John! 👍🏻😊
Thanks, John!
You’re welcome!
Beautiful shots, John.
Thanks, Janet!