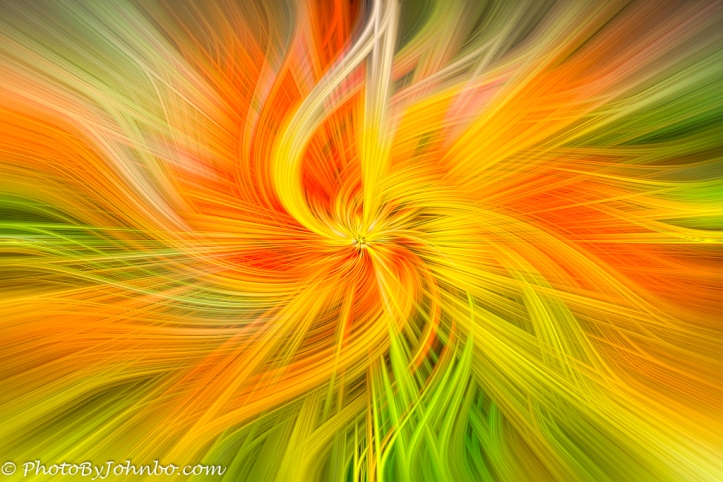
Fargo, North Dakota.
As I am working on this post, it’s late April. We’ve been back in Fargo for nine days and we are honoring the North Dakota Governor’s mandate that snowbirds spend two weeks in quarantine. So far, we are fine here, but going a bit batty from watching TV and doing puzzles. Our bright spot of the day is the online exercise classes we’ve found to keep us at least a little bit active. But I digress from my digression…
The opening image is a “trick” I’ve seen going viral on a lot of photography websites. They look interesting and fun to do. It turns out that they are simpler to create than I might have thought. You don’t even need to go out and take “special photos” to make these images “Twirl”. All of the example images in this post were gathered from random selections in my own personal image archive.
What follows here is a tutorial on how to create these “twirled” images. I know many of my readers couldn’t care less. For those in that category, I invite you to scroll to the end of this post where you will find a gallery of images created using this technique.
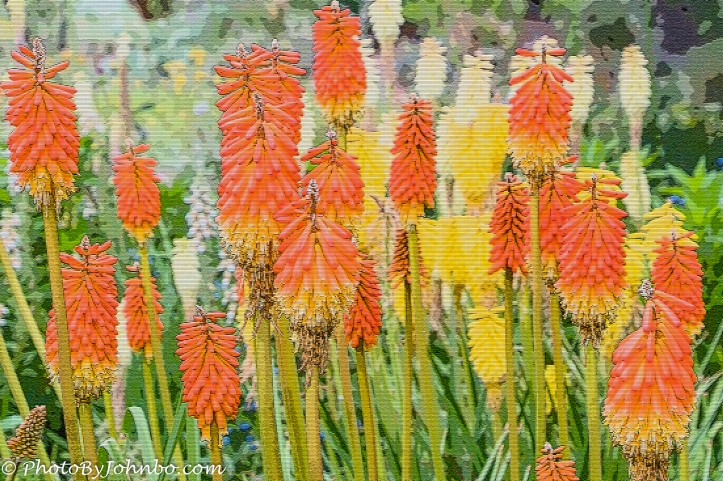
It does help if the image has a variety of colors. The opening image was created by manipulating the image of orange and yellow flowers using Photoshop Elements. There are plenty of YouTube tutorials on using Photoshop to create these geometric patterns, and if that’s a tool you have access to, you can search on YouTube. I use Photoshop Elements, however. Long story, but until I have to, I’m not jumping on Adobe’s “subscription train.” I just don’t like the concept of subscription software. Right now, I’m using PS Elements 2019. I couldn’t find any tutorials on YouTube, but I know that most of what’s in Photoshop is in Elements. You just have to look for it. The process takes only 6 steps from image to twirl. Bear with me and I’ll show you how easy it is to create your own twirls with Photoshop Elements.
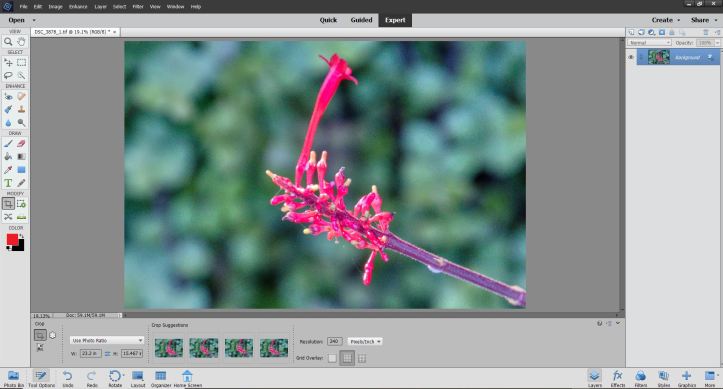 Step one: select an image, crop and adjust as you see fit. I found an image from a collection of floral photos captured in North Carolina’s Duke Gardens. Note that In Elements, I am using Expert mode (not that I consider myself an expert, it’s just that the menus are easy to navigate for this process.)
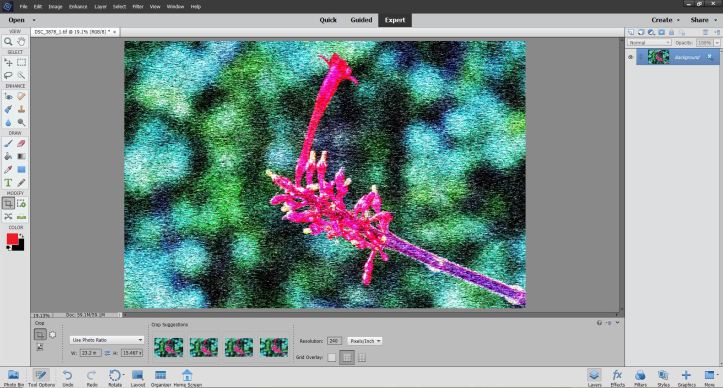 In the Filters Menu, find Pixelate>Mezzotint… In the dialog box that opens, select “Medium Strokes” from the available options.
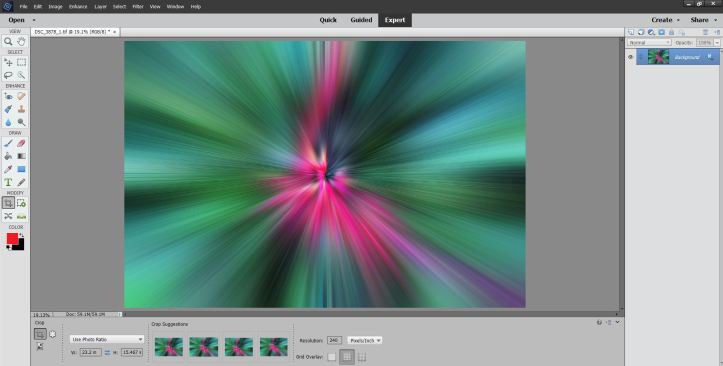 Next, from the Filters menu, choose Blur>Radial Blur… and from that dialog, select Zoom, and 100, and Good.
 Now, from the Filters menu, choose Distort>Twirl… and in that dialog, set the angle to 100. You will see the first half of the twirl begin to take shape.
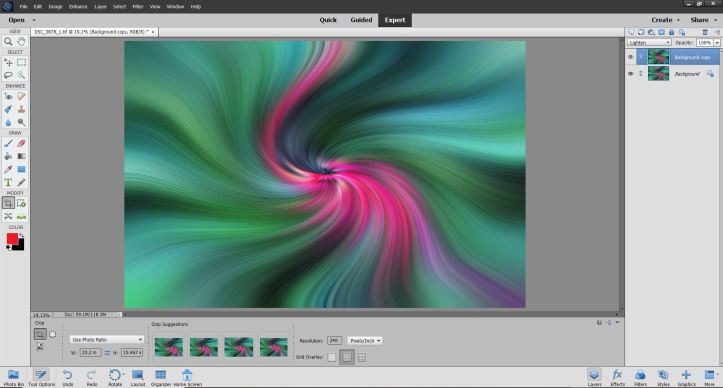 On the right, you’ll see the Background layer icon. Right-click on it and choose Duplicate Layer… Select that and just click OK on the dialog. You will now see a second layer icon that has become active. From the dropdown above the new layer that says “Normal”, choose ‘Lighten.’
Note: If you cannot duplicate the layer, then the image is a 16-bit image. To work in layers, the image must be 8 bits/channel. You’ll find that setting in the Image menu, select Image>Mode and select 8 bits per channel. You will then be able to duplicate the layer. Don’t worry, you won’t notice any loss in image quality.
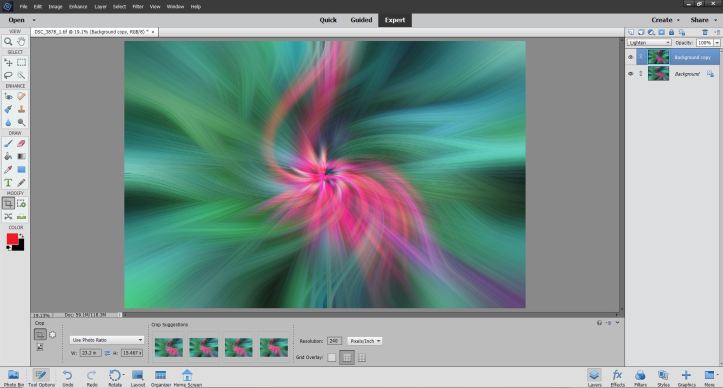 This new layer is now the active layer. Go to the Distort>Twirl… option and this time, change the number to -100. The twirl image is almost complete. By the way, if you reverse the order of entering the 100 and -100 twirls, the image will twirl counter-clockwise instead of clockwise. All that’s left to do is tweak for contrast and effect which you can do right there in Photoshop Elements.
 My preference, however, is to make those adjustments in Luminar 4. That program has a large selection of preset filters that the developer of Luminar calls Looks. I seldom use them when working on photos, preferring to adjust specific sliders to achieve the “look” that I want. But when it comes to these Twirls, I’ve found that there are several Look presets in the Landscape series that can enhance the image with a single click. For this specific image, I found the Autumn Colors Look to add some warm tone to some of the “petals” in the twirl. From there, I tweak specific sliders that I think might help the image, for example, backing down on highlights when there is a lot of white in the image.
If you read this far, (or if you just scrolled to here), you’ve reached the point where I say, “I submit for your review a gallery of images created with the Twirl effects in Photoshop Elements. In most browsers, you can click on an image to enlarge it and scroll through the gallery. If you’ve tried creating twirl images, let me know how you like the trick in the comments.
John Steiner


These are cool!!!
They are fun to create.
Hi John, I’m super stoked. I tried it and the first time I messed up a few steps, but the second time looks fabulous. WOW! There is so much more I can do with simple Photoshop Elements. I’ve used some of the processes, but not too often together. This is the coolest thing ever. 🙂 Thanks!
Truly a fun project. When I was setting these up last year, I did 13 of them and had a calendar printed, one for each month and one for the cover. Good time!!
That sounds like so much fun, John. I started experimenting with different ways to do it. I’m trying to create Tina’s ethereal picture that she had a few months ago when she was doing an artsy post. What else have you experimented on? I’m going to have to search your site for the word Elements! You have no idea how excited I am that you are an Elements user. Wahoo!
Twirls are as complicated as I have gotten with Elements. For a couple of challenges, I used artistic filters to enhance images, nothing unusual.
I have played with all the fun edits in the guided section. They guide your through using several tools. Have you tried those? I love them.
I haven’t tried them all, but when I have had time to experiment, I tried some of them that I thought might be useful.
I use some of them fairly frequently. Here’s one of the Lens Artist challenges I did. https://tchistorygal.net/2021/02/07/lens-artist-134-how-to-turn-car-show-photos-from-forgettable-to-favorite/
Coincidentally, that challenge is also a time when I used several filters.
By the way, I love car shows as well. There was a gathering in neighboring Moorhead, Minnesota yesterday. I didn’t happen to get there last night, but they will be meeting first Thursday of the month all summer.
Did you see my BrightSquare photos of car shows? I had a great time with that. We LOVE car shows! We’ve owned several different cars in our 26 years together.
I might have, but I will look for it for sure.
Just search Prescott Car Show.
[…] –John Steiner […]
Johnbo, I started following you when you first started blogging and I don’t think I’ve missed a single post. If that isn’t a recommendation for your site – I don’t know what is!!
As a WWII history buff, I enjoy your posts on the war in the pacific. Thank you for your support over the years!
It’s been mutual!
I found my way here from Marsha’s interview which I found very interesting (having been interviewed by her myself recently!) I love your gallery of twirls and as an Elements user myself found your instructions very clear. I could get addicted to this! I included a twirl in my most recent post (https://www.toonsarah-travels.blog/exploring-the-temple-gardens-of-kyoto/) if you’d like to see what I created on the back of your instructions. Rather than Luminar I used Nik Color Efex Pro which I have as an Elements plug-in, and found that gave me several options for refining the finished image. Thanks for the inspiration!
Thanks, and glad to see others enjoying my work in converting the process from Photoshop to Elements. I know there are a lot of Elements users who “get short-shrift” on YouTube videos. >grin<
I will check out your twirl. They are a fascinating way to pass the time.
On Nik, I've mostly used Silver Efex routinely for black and white conversions, but occasionally use some of the other modules for special effect as well.
I use SIlver Efex too. In Color Efex I like some of the vintage filters for arty shots, while the colour contrast settings are worth experimenting with. I sometimes add a shot of brightness with the reflector effect or sunshine, and there’s a good range of options on vignettes too 🙂
[…] This is a twill background that I learned from John Steiner. […]
This is way cool, John. Thanks for the tutorial!
Thanks for stopping by and for the compliment!
[…] recently learned, from John Steiner’s helpful tutorial on his Photos by JohnBo blog how to create twirled images with Photoshop Elements, and I’ve gone a bit mad with them. I […]
Look what you started! https://www.toonsarah-travels.blog/gallery-twirling-away-with-a-new-photo-effect/
I just left your site moments ago as I saw your link to my page. Great collection of images.
I need a new calendar (mine expires at the end of the month). I think I’ll create a bunch of new twirls and have a whole year of twirls on the side of our refrigerator. 🙂
That sounds fun! And share them here too maybe?
[…] Soon after the beginning of the pandemic quarantine, I was checking out some photography blogs and YouTube videos and I came across some tutorials on how to create abstract art out of a standard photograph. A Twirl is created by a certain sequence of steps in manipulating an image. The more colorful the image, the more colorful the twirl. I have a blog post that tells how I did my collection of twirls here. […]