Send mail with different reply-to address – part 2

Like the in cu 400 used mailing .net assembly the one used in cu 397 has very basic functionality, assembly Microsoft.Dynamics.Nav.Integration.Office. So if you want to use additional properties like setting a different reply-to address or using as different sender address, it is needed write it’s own code using basic .net assemblies. In  part 1 of this series i showed how to send smtp mails with the opportunity to set a different reply-to address. In this part i who, how to get the same with oulook based functionalities.

// variablesolApp, DotNet, Microsoft.Office.Interop.Outlook.ApplicationClass.'Microsoft.Office.Interop.Outlook, Version=15.0.0.0, Culture=neutral, PublicKeyToken=71e9bce111e9429c'olMailItem, DotNet, Microsoft.Office.Interop.Outlook.MailItem.'Microsoft.Office.Interop.Outlook, Version=15.0.0.0, Culture=neutral, PublicKeyToken=71e9bce111e9429c'olItemType, DotNet, Microsoft.Office.Interop.Outlook.OlItemType.'Microsoft.Office.Interop.Outlook, Version=15.0.0.0, Culture=neutral, PublicKeyToken=71e9bce111e9429c'SendOLMail()IF NOT ISNULL(olApp) THEN  CLEAR(olApp);olApp := olApp.ApplicationClass;olMailItem := olApp.CreateItem(olItemType.olMailItem);olMailItem."To" := 'receiver@test.com';olMailItem.Subject := 'subject text';olMailItem.Body := 'This is the message.';// set reply-to addressolMailItem.ReplyRecipients.Add('replyAddress@test.com');olMailItem.Send;CLEAR(olMailItem);CLEAR(olApp);

for using a different sender address in outlook mails follow this post.

cheers


Send Mail with different Reply-To Address

The properties of the used .net assembly Microsoft.Dynamics.Nav.SMTP in CU 400 is very basic, e.g. applying a different Repl-To Address is not possible. For that it’s needed to go to the basics, means use the basic .net classes for Mailing. Following codeunit is a solution for that issue.

// global variablesSmtpClient, DotNet, System.Net.Mail.SmtpClient.'System, Version=2.0.0.0, Culture=neutral, PublicKeyToken=b77a5c561934e089'MailMessage, DotNet, System.Net.Mail.MailMessage.'System, Version=2.0.0.0, Culture=neutral, PublicKeyToken=b77a5c561934e089'OnRun()// Test the mail functions using a sample gmx mail account 'your_account@gmx.at'CreateMessage('sender name','your_account@gmx.net','your_account@gmx.net','subject','message text','reply name','replyTo@gmx.net');SendSmtpMail;CreateMessage(SenderName : Text;SenderAddress : Text;Recipients : Text;Subject : Text;Body : Text;ReplyToName : Text;ReplyToAddress : Text)// local variablesFromAddress, DotNet, System.Net.Mail.MailAddress.'System, Version=2.0.0.0, Culture=neutral, PublicKeyToken=b77a5c561934e089'ReplyAddress, DotNet, System.Net.Mail.MailAddress.'System, Version=2.0.0.0, Culture=neutral, PublicKeyToken=b77a5c561934e089'// create from addressFromAddress := FromAddress.MailAddress(SenderAddress, SenderName);// create mail messageIF NOT ISNULL(MailMessage) THEN  CLEAR(MailMessage);MailMessage := MailMessage.MailMessage;MailMessage.From := FromAddress;MailMessage.Body := Body;MailMessage.Subject := Subject;MailMessage."To".Clear;MailMessage."To".Add(Recipients);// create and add reply-to-addressReplyAddress := ReplyAddress.MailAddress(ReplyToAddress, ReplyToName);MailMessage.ReplyTo := ReplyAddress;SendSmtpMail()// local variablesSMTPMailSetup, Record, SMTP Mail SetupNetworkCredential, DotNet, System.Net.NetworkCredential.'System, Version=2.0.0.0, Culture=neutral, PublicKeyToken=b77a5c561934e089'SMTPMailSetup.GET;WITH SMTPMailSetup DO BEGIN  SmtpClient := SmtpClient.SmtpClient("SMTP Server","SMTP Server Port");  SmtpClient.EnableSsl := "Secure Connection";  IF Authentication  Authentication::Anonymous THENIF "User ID"  '' THEN BEGIN  SmtpClient.UseDefaultCredentials := FALSE;  NetworkCredential := NetworkCredential.NetworkCredential("User ID", Password);  SmtpClient.Credentials := NetworkCredential;END ELSE BEGIN  CLEAR(NetworkCredential);  SmtpClient.Credentials := NetworkCredential;  SmtpClient.UseDefaultCredentials := TRUE;END  ELSE BEGINCLEAR(NetworkCredential);SmtpClient.Credentials := NetworkCredential;SmtpClient.UseDefaultCredentials := FALSE;  END;  IF ISNULL(MailMessage) THENERROR('Mail msg was not created');  SmtpClient.Send(MailMessage);  MailMessage.Dispose;  SmtpClient.Dispose;  CLEAR(MailMessage);  CLEAR(SmtpClient);END;

The Smtp Setup:

Mail sent result:

you can also use that codeunit for other purposes as template, e.g. for setting a different sender address.

for sending outlook mails with different reply-to address follow part 2 post of that series.

cheers


Setting up precisions

In Dynamics Nav amount and currency precisions are set on a central point, in the General Ledger Setup. These settings apply for the LCY (Local currency). Foreign currencies are configured in page Currency Card (on base of table Currency).

Fields “Amount Decimal Places”, “Amount Rounding Precision”, “Unit-Amount Decimal Places” and “Unit-Amount Rounding Precision” are maybe missing in this page. In the standard page they are not shown. In that case adde them to the page in the development environment.

In the currency card you can configure foreign currencies. Here you find the same fields to set the precision as in the general ledger setup. This is also the place to set/update the exchange rates.

For details about the fields in G/L Setup follow
https://msdn.microsoft.com/en-us/library/hh168649(v=nav.70).aspx
https://msdn.microsoft.com/en-us/library/hh169567(v=nav.70).aspx

For details about the fields in the Currency Card follow
https://msdn.microsoft.com/en-us/library/hh169173(v=nav.70).aspx
https://msdn.microsoft.com/en-us/library/hh170490(v=nav.70).aspx
https://msdn.microsoft.com/en-us/library/hh168784(v=nav.70).aspx

Additional it’s possible to activate automatic invoice rounding:
To make sure that sales and purchase invoices are rounded automatically, you must activate the invoice rounding function. In the Search box, enter Sales & Receivables Setup or Purchases & Payables Setup, open the page, on the General FastTab, select the Invoice Rounding check box. You can activate invoice rounding separately for sales and purchase invoices.

cheers


How to: Manage a mobile app project

When a custom mobile client for Dynamics Nav is needed, there are a couple of ways to implement that. A couple of questions need to be answered, major decisions have to be made, especially, if you do want use the app not only for yourself, but you want to provide the app in online stores, provide it your customers.

Using ready-to-use solutions:

  • Anveo: Full mobile client for Dynamics Nav especially for Sales People. Provides offline working.
  • Mobile Nav: Ready-to-use mobile client, customizable, extensible, can be used online and offline (!), Secure comunication, barcode scanning, direct printing from device, multilingual; available for Android, IOS, Windows; usable for Nav 2009 R2 – Nav 2016
  • Sana Mobile: similar features as ‘Mobile Nav’, but only available for IOS (Apple devices: IPhone and in the near future also available for IPads). The app is optimized for sales agents.
  • Dynamics Mobile: similar features as Mobile Nav

Starting from scratch:

This is maybe the more expensive and more time consuming variant, but you can develope a full custom solution. For the mobile app you need an Sdk according the OS (Android, IOS, Windows). At the end it could be that you have to develope the mobile client 3 times. You have also to decide, if you want the get an online only app or if it also usable offline. Alternatively you could develope a web solution, which runs in the device browser.

The mobile app is then connected to the Dynamics Nav system with Nav web services. Nav web services are nav objects like codeunits and pages, which are so called published as .net web services, they are based on the SOAP protocol. For details goto here. If you go that way and want to use nav web services, i recommend NOT to use standard nav objects, especially not to use pages, because that is unsecure and you publish much more functionality than you want or need. Nav web services based on SAP are available since Nav 2009. Since Nav 2013 ODATA is provided, a new web service technology, quite faster, but with that Nav version only for read operations. Since Nav 2015 ODATA is usable for read AND write operations.

Prepare you project:

Start with a market study:

  • What are the existing solutions?
  • Are they suitable for you, are they customizable?
  • Are they usable online and offline, if needed ?
  • Which platforms are supported (Android, IOS, Windows), which do you need/want ?

Features:

  • What features, functions do you really want/need in your app? The few the better !!
  • Only provide the really needed functions (cheaper, faster): i suggest start for the first version with item list, customer list, vendor list, sales orders, purchase orders; additional the possibility to view, maybe edit the entries.

Users:

  • Which users do you target: “normal” end users, sales persons, CEOs? Different types of users may need different functions, different interfaces.
  • Ask some of your customers what they would expect from your mobile app

Interface:

  • The Gui, the interface of the app is the main thing. Always start with the gui; it should be cool, easy to use, should make the WOW effect. You’ll need a graphic designer for the gui.
  • Create the custom codeunits with the needed functions AFTER the gui, not vice versa, because that won’t work, will end in a crashed project.

so have fun with your mobile app project.

cheers


Localisations for NAV

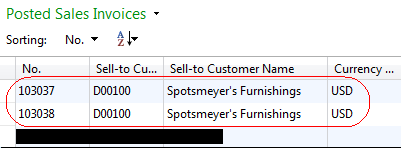
Localizations for specific countries are quite often an issue. Microsoft provides only a couple of localizations: Australia, Austria, Belgium, Canada, Denmark, Finland, France, Germany, Great Britain, Iceland, India*, Italy, Mexico, Netherlands, New Zealand, Norway, Russia*, Spain, Sweden, Switzerland, United States.

* The supported countries can differ between the Nav versions.

The complete lists you’ll find here.

For countries, where there is no localization, best start with Dynamics Nav W1 version. This is the base version of Dynamics Nav, contains no localization at all. So it can be used in every country, but needs a couple of customizations according to national laws, e.g. changes in the accounting/finance area, new and customized reports a.s.o. Additional you’ll may need a new language layer. For that look for a Nav partner located in your region, start with Pinpoint.

Following a list of Nav Partners, who have developed additional localizations. This list will be periodically updated:

Europe:

  • Slovenian Nav Partner Business Solutions d.o.o., also known for their great Permission & Role Wizard for Nav 2009, has developed Nav 2013 localizations for following countries: Slovenia, Croatia, Serbia, Bosnia and Herzegovina, Montenegro, Macedonia, Kosovo. Included are additional functionalities and tools. They provide the localizations in 3 packages: basic, extended, integrated. Maybe they also have developed localizations for the newer Nav versions. If you need it, contact them directly.
  • Adacta group: localization for Slovenia, Croatia, Serbia, Macedonia and Montenegro.
  • Effekt: located in Athens, developed greek localization at least for Nav 2013.
  • IT.integro: localization for Poland. thx to daniele rebussi for the hint.
  • Awara IT Solutions: localization for Russia, especially for the accounting/finance area.
  • Multisoft: localization for Hungary.
  • Alna: localization for Lithuania. Alna is active in Lithuania, Latvia and Poland.
  • EDPA: localization for Latvia
  • CDL.System: Czech localization
  • Autocont CZ a.s.: localizations for Czech Republic and Slovakia
  • Wbi: localization for Slovakia
  • Intelligent Systems: localization for Bulgaria
  • Team-Vision: localization for Bulgaria
  • Infotekas: localization for Turkey. Nav versions 2013 R2, 2015, 2016 in development.
  • Softstore / Link Consulting: localization for Portugal

Americas:

  • Cadia Consulting, located in Sao Paolo, developed a brazilian localization.
  • Master Consulting Group: localizations for LATAM, Peru, Ecuador, Colombia and Bolivia. They are also developing localizations for Chile and Panama.
  • Voxa: localization for Argentina
  • Grvppe: localization for Brazil

Asia:

  • PT SME Solution, located in Jakarta, Indonesia, developed an indonesian localization at least for Nav 2013.
  • PBC and Tectura Korea: localization for China.
  • PBC also developed a localization for Japan.
  • Ibizcs: localizations for Singapore, Malaysia, Thailand, Indonesia and China. Provided Nav versions: Nav 2009, 2013, 2015.
  • Naviworld: localizations for Vietnam and Thailand.
  • Arvato Systems developed a localisation for China

For Nav Partners, who want to develop a localization, they can start with the Microsoft Dynamics Localization Portal – Microsoft Dynamics NAV. They will be assisted by Microsoft (documentations, country specific legal stuff, …).

cheers


Where-Used-Tools for Dynamics Nav

Dynamics Nav does not ship with a Where-Used-Tool, although it is often needed. A Where-Used Tool is a tool, with which you can check, which nav objects use/reference a certain nav object or a certain table field.

Idyn has developed a widly used Toolset, the Object Manager Advanced (OMA). It is very helpful, contains that kind of tool, also a version/source control, rename tool, a.s.o. but it has it’s prize. 😦

Other Where-Used/Search tools:

  • Statical Prism“: free community version available, cheapest full version you can get for $37.
  • GDT Where Used“: This small free tool lists all Nav objects and has a “Where used” function. It supports Nav 5, Nav 2009, Nav 2013. . Looks very nice, it’s worth to test it.

02/2016, News about “GDT Where used”: There is a new version, which now supports also Nav 2015 and Nav 2016.

Error: An attempt was made to change an old version of a “Sales Line” record

When posting e.g. a Warehouse Shipment or an other document concerning direct or indirect table “Sales Line”, then following error can occur:

An attempt was made to change an old version of a “Sales Line” record. The record should first be reread from the database. This is a programming error. Identification fields and values: …

Technical Detail:
This error occurs, when “Sales Line”.modify is called.

Reason:
The code was customized. Along the call chain the same “Sales Line” record is modified before the call, where the error occurs. That means there is a customized code (maybe in CU 80 or table “Sales Line”), where some fields are changed, then “Sales Line”.modify is called. After that “Sales Line”.modify is called a second time. That is not allowed.

Solution:
If you did not change the code by yourself, contact the colleague, who made the last changes or contact your NAV Partner. First challenge is to find the position, where “Sales Line”.modify is called first.
Hint: Debug the function, which causes the error and set a breakpoint into trigger OnModifyDatabase in CU 1. This trigger is called each time command modify is called.
When the position is found, change the code. If possible remove the first “Sales Line”.modify call.
Other solution: Reload the “Sales Line” record at the second position (where the error occurs) before calling modify with GET, then write the needed field changes, then call modiy.

cheers

Error: You do not have the following permissions on CodeUnit ApplicationManagement: Execute

If you get following error:

then your nav user account has to less rights to work with the RTC client. This kind of error is normally shown, when you start the RTC client.

Reasons for that error can be:

  • You work with a database which comes from outside of your windows domain
  • Your permission set was changed

To solve that issue best you open SSMS (Sql Server Management Studio) and view table “User”. Search for your windows/nav account in field “User Name”. To go further you need the value in field “User Security ID”. Remember that value.

Then edit table “Access Control” and look for the same value in field “User Security ID”.

Change the “Role ID” value to SUPER, click the ENTER key to assign the change.

After that restart the RTC client and change your user settings as needed.

Cheers

Disable page & ribbon customization

In the RTC client it’s possible to prohibit customizations done by users. This can be controlled by user profiles. In the sample i use profile “Project Manager”. To assign a profile to a user goto page “user personalisation”.

After that close the RTC client and re-open it. After that click on the Dynamics Button (blue button in the top/left corner) on the start page (Home/Role Center) and select menu item “Customize”. There we get a list of subitems to customize the page.

Then we change the profile. To change profile settings write “profiles” into the Search box and select page “Profiles”. Select profile “Project-Manager” and open the card page (Edit Button).

Here set checkbox “Disable Personalization” to true and close the page. After that close the RTC client and re-open the client. Now click again on the Dynamics Button/Customize on the Home page (Role Center). We get then a reduced list with no customze subitems.

Additional changes:

With opportunity to customize you can save filter settings, without you can’t.

In Page “Items “Factbox “Item Details – Invoicing” the settings button with 2 menu items is visible with default settings.

Without customize opportunity the settings button is invisible.

If you have the problem that a user cannot change page settings (Customizations), then check if the user has assigned a profile with above setting “Disable Personalization”.

Cheers

Convert SETSELECTIONFILTER to SETFILTER

If you want to print more than one document in a document list at one stroke – e.g. sales invoices – you would select 2 or more records and then start printing.

But, … in the request page only the last selected document no. or, also possible, no number is set.

Internally in most cases a setselectionfilter command is applied to get the selected records. But whats going on, when selecting the records? each record is marked. With setselectionfilter we can filter the selected record for the setfilter expression.
To print all selected records in one stroke you can do following. Add a new action to the action list of the list page and add following code to the new action trigger:

// local variablesSalesInvHeader | Record | Sales Invoice HeadernoFilter | Text// the code - OnAction()CurrPage.SETSELECTIONFILTER(SalesInvHeader); // fetch the marks// internally property Marked is set to true at the selected records// the loop will fetch only these recordsIF SalesInvHeader.FINDFIRST THEN BEGIN  REPEATIF noFilter  '' THEN  noFilter := noFilter + '|';noFilter := noFilter + SalesInvHeader."No."; // create filter expr.  UNTIL SalesInvHeader.NEXT = 0;  CLEAR(SalesInvHeader);  SalesInvHeader.SETFILTER("No.",noFilter); // create the filterEND;REPORT.RUNMODAL(206,TRUE,FALSE,SalesInvHeader);

As result we get:

Cheers